
For this first of two steps, we need to link your Muse Account to your Star Micronics account.
-
Create an account at https://starmicronics.com/stario/
-
Login with the account you just created. If the login fails, please click on Forgot Password.
-
Accept the privacy agreements.
-
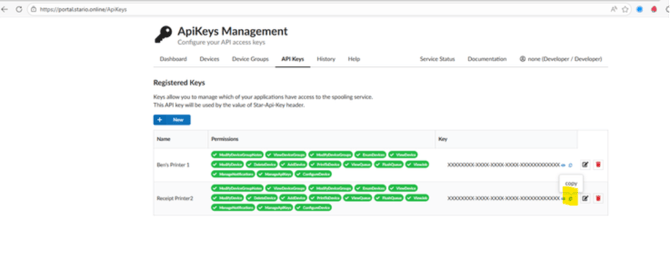
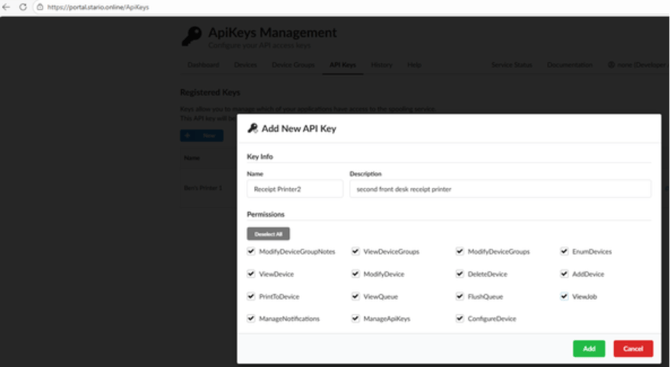
Go to API Keys tab, click on '+ New' to generate a new API Key and copy it for later. Please ensure that all 15 permissions are selected. Once that is done, you screen should show each permission in a green bubble like the screenshot below.
-
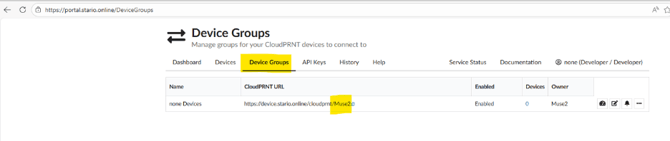
Go to Device Groups tab and copy the last word of the CloudPRNT URL (for example, if the URL is 'https://device.stario.online/cloudprnt/museapp', copy 'museapp'. This is your Group path.
Take the API Key and Group Path that were generated above and copy/paste those into the appropriate Muse fields presented in the Settings pop-up. Click "Save changes".
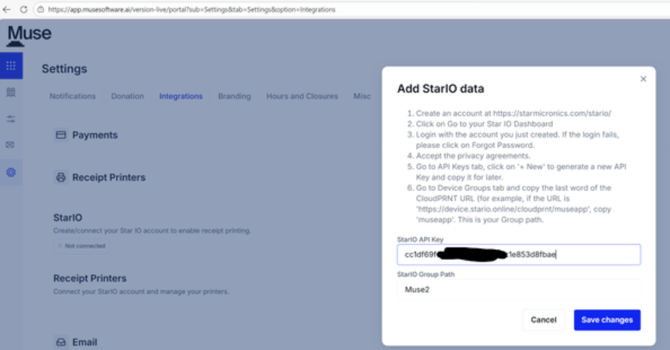
7. Visit the Muse Portal > Settings > Settings > Integrations
8. In the Receipt printers section click "Register New Printer". A pop-up will appear that includes a blue hyperlink to the full instructions, but you can also find them below:
9. Connect printer via ethernet cord directly to your router.
10. Connect your cash drawer directly to your printer using an RJ11 ("phone jack") connector or other device-specific connector.
11. Hold down the feed/multi-function button (front) and, while pressed, turn on power (back).
Printer should now print multiple receipt segments; one segment will include the printer IP address based on the connected router.
12. Open web browser while computer is connected to the same LAN/network (computer may be connected wirelessly).
13. In the address bar, type the IP address printed on the receipt (e.g., http://xxx.xx.xx.xx) and press enter to visit the page.
14. Log in (default credentials = root/public).
15. From the left navigation, under Network Configuration, select CloudPRNT. Change the inputs as follows:
-
-
CloudPRNT: ENABLE
-
Server URL: Paste the URL you copied from your Star Portal
-
Polling time: 5
-
HTTP Response Timeout: 60
-
16. The printer will automatically print out a receipt with an access identifier. You will find an email address printed out by your receipt printer that will look like xxxx-[access identifier]@print.starmicronicscloud.com. The part between the hyphen and the email domain, xxxx-[access identifier] is your access identifier.
17. Copy that value, close this window, and paste it in the specified input.
After completing the above steps, take the Access Identifier generated above and copy/paste it into the field within Muse.
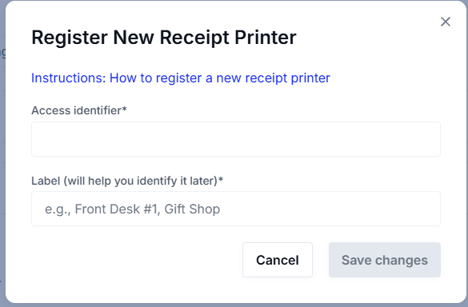
18. Add a Label that aligns with the Station this Receipt Printer will be paired with
-
-
Examples: Front Desk 1, Gift Shop, etc.
-